According to Ayurveda, ghee is considered the ultimate superfood. An excellent source of healthy fat, vitamins and antioxidants, ghee aids in weight loss, has anti-inflammatory properties and supports heart health.
Just like any other food, homemade ghee is much superior to store-bought ones in terms of flavour and nutrition. And the easiest way is to make it from butter. But if the butter is store-bought, it wouldn’t have the superior flavour and nutritional value of homemade ghee. Else, if you really want to make it from scratch, use milk.
When I first set out to make ghee, I was overwhelmed and worried that I would mess it up. But honestly, it is pretty hard to botch it up. It may take some time to collect the cream from the milk. But, after that, the process is so simple because ghee is very forgiving.
The first step to making ghee is collecting cream from milk. Depending on how much milk you use every day, it may take anywhere from 1 week to 2 months to collect enough cream for the ghee. If you use just half a litre of milk every day, then it would be a good idea to store the cream in the freezer. This way, you can be sure that your cream doesn’t get spoilt. But, if your family consumes 1-2 litres of milk on a daily basis, you can keep the cream in the fridge as you would collect the required quantity in just 2-3 weeks.
Ghee Vs Butter
Though ghee is made by heating butter, ghee is far superior in terms of nutritional benefits. When you heat butter, all the milk solids separate, making it suitable for lactose-intolerant individuals.
Ghee has a higher smoke point and it contains lesser acrylamide, compared to butter and other oils. Acrylamide is a potential carcinogen that is proven to increase cancer risk in animals. However, its effect on human beings is still not conclusively proven. But a drawback is that ghee is more calorie-dense than butter.
Now, let us explore how to make ghee and butter from milk.
How To Make Ghee From Milk?
Time needed: 14 days and 1 hour
Step-by-step instructions on how to make ghee from milk. Note that most of the time required is passive as it is for collecting malai ( cream) from milk. If you exclude that, it takes less than an hour to make ghee from milk.
- Boil The Milk
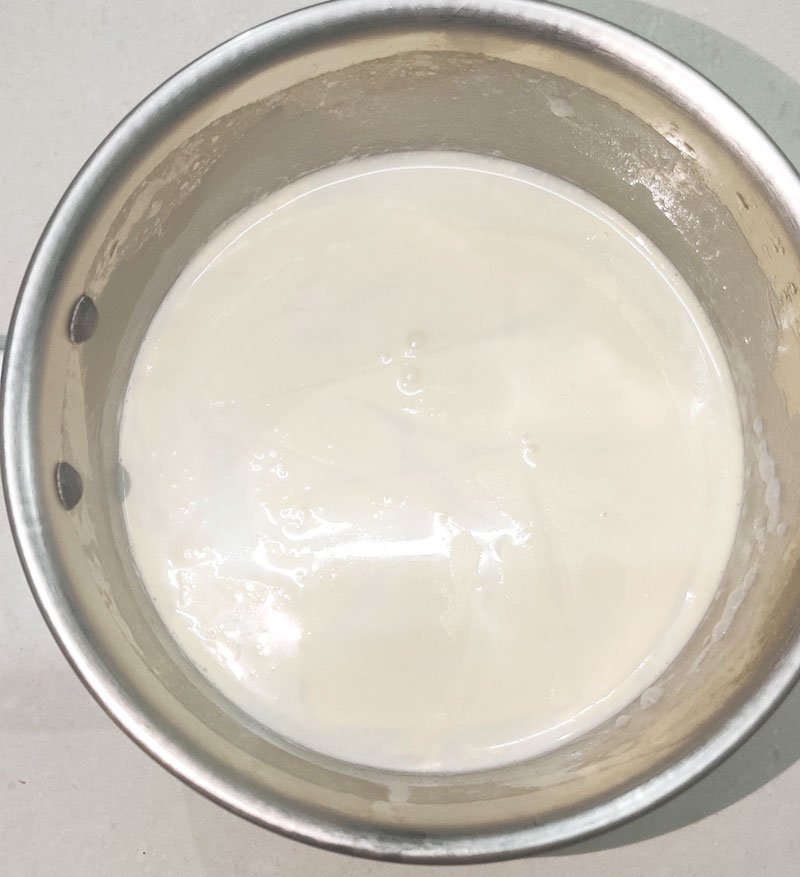
As mentioned earlier, the first step is deriving cream from milk. For this, boil full cream milk on a low flame in a wide saucepan. Then, let it cool to room temperature. Avoid boiling on a high flame because the water content will evaporate quickly and you will get only a thin layer of cream. Moreover, milk loses its water-soluble vitamins when you boil on a high flame.

- Refrigerate The Milk
When the milk cools down to room temperature, move it to the refrigerator for3-4 hours so that the cream thickens further.

- Collect Malai
Next, pass the milk through a sieve to collect the cream. Then store it in a container in the freezer. Repeat this process every time you open a packet/can of milk till the container is full. Aim to collect at least 500 gm of cream to make the whole effort worthwhile.

- Defrost The Malai
Once the container is full, defrost it by moving it to the fridge for a day.

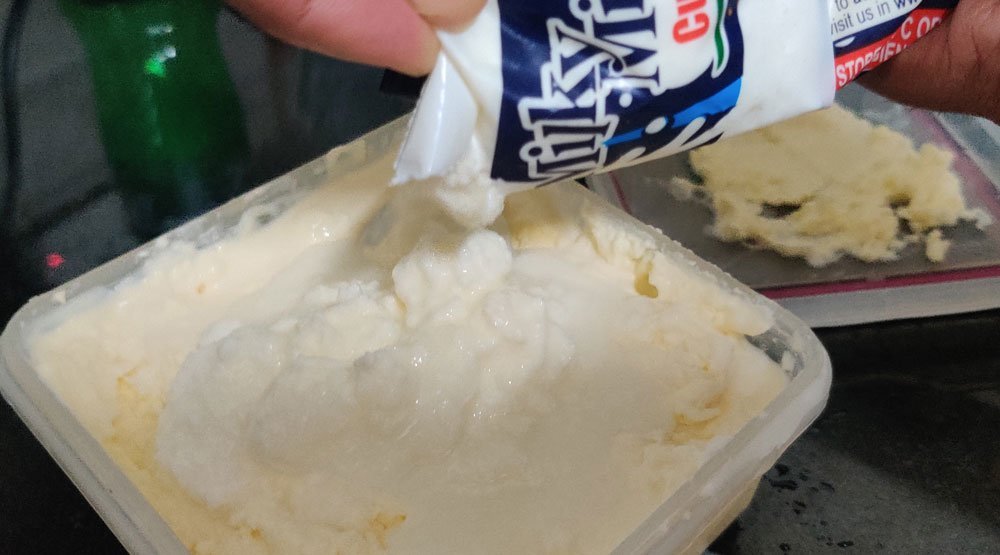
- Add Curd
Add 2-3 Tablespoons of curd and leave it overnight for fermentation. This step essentially helps make “cultured ghee” which is better for lactose-intolerant people because once you ferment the cream, there is no lactose in it as it all gets converted to lactic acid. If you don’t have lactose intolerance, you can skip this step.

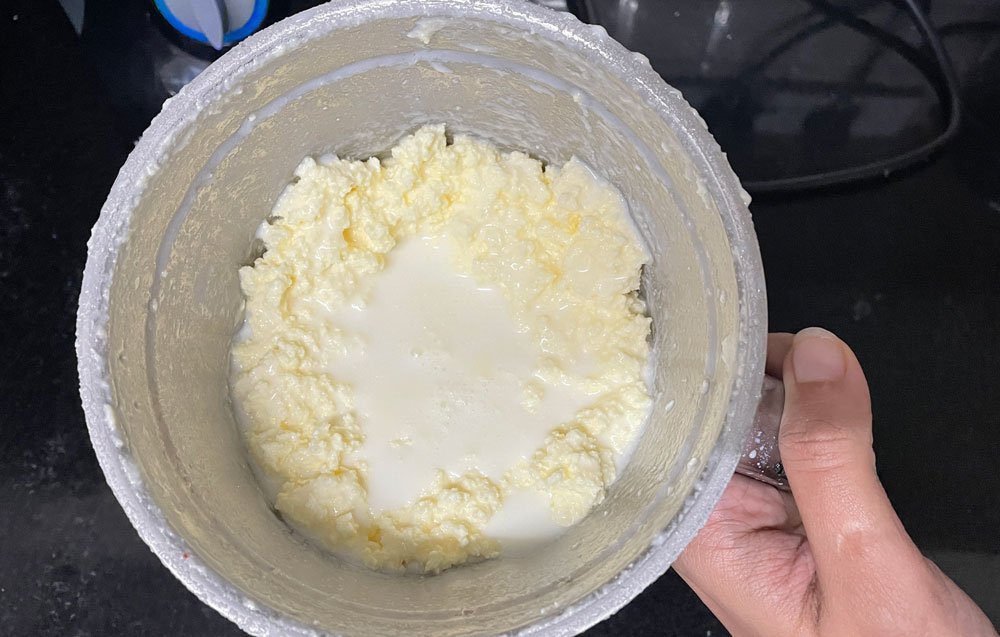
- Transfer To Mixer Grinder Jaar
The next morning, pour the fermented cream into a blender and add some cold water. If you stay in a place with a warm climate, consider adding a few ice cubes too. This is done to offset the heat generated by the blender and help the fat separate from the buttermilk.

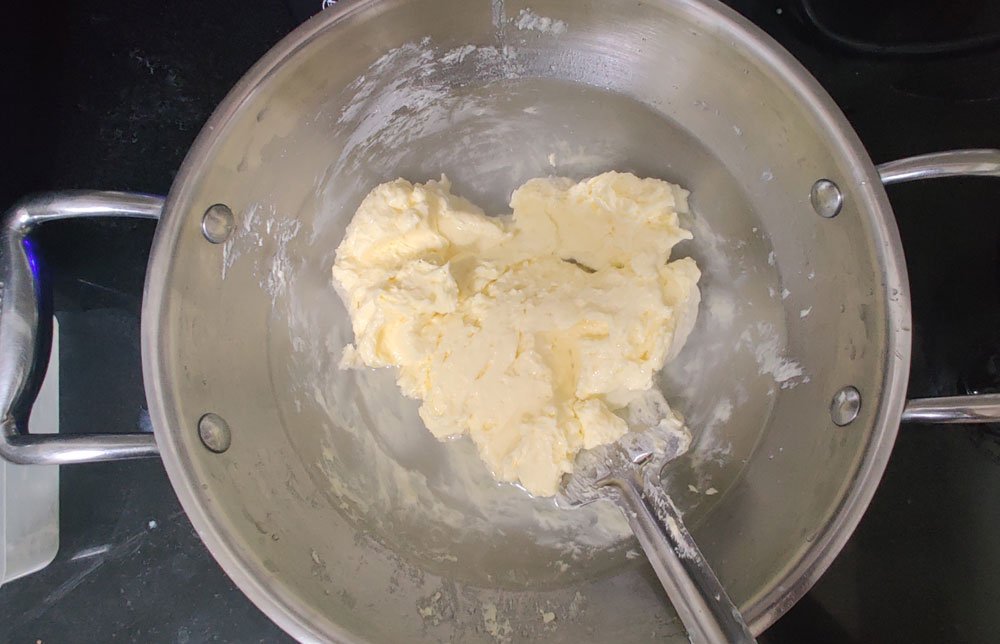
- Churn The Butter
Run the blender at the lowest speed for a minute to churn the butter. The white liquid you see is buttermilk. You can also use a hand blender for churning instead of your mixer grinder.

- Wash The Butter
Wash the butter a few times in cold water to remove any milk solids. Else, when you heat the butter in the next step, you will find a lot of milk solids floating around and it will take a much longer time to make ghee.

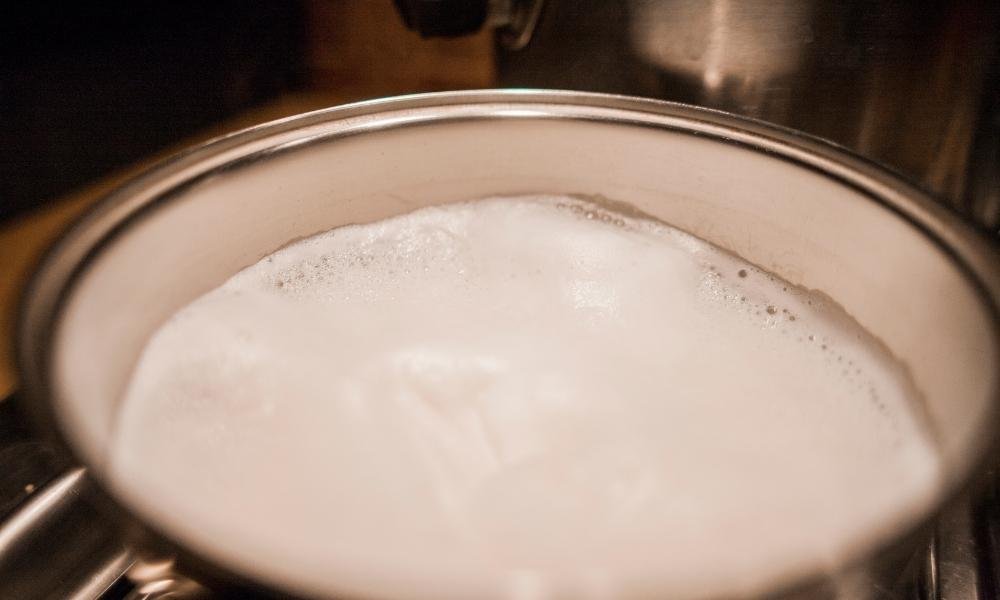
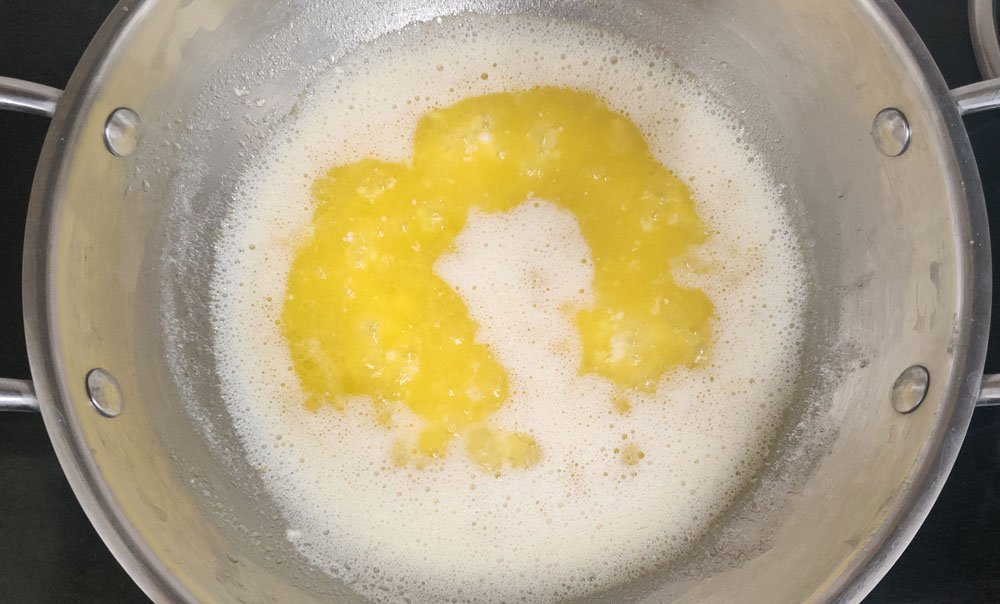
- Heat The Butter
Heat the butter on a medium to high flame for 10-15 minutes and keep stirring in between. Use a large utensil, as the butter will melt and increase in volume. Preferably use cast iron or stainless steel which has better heat retention.

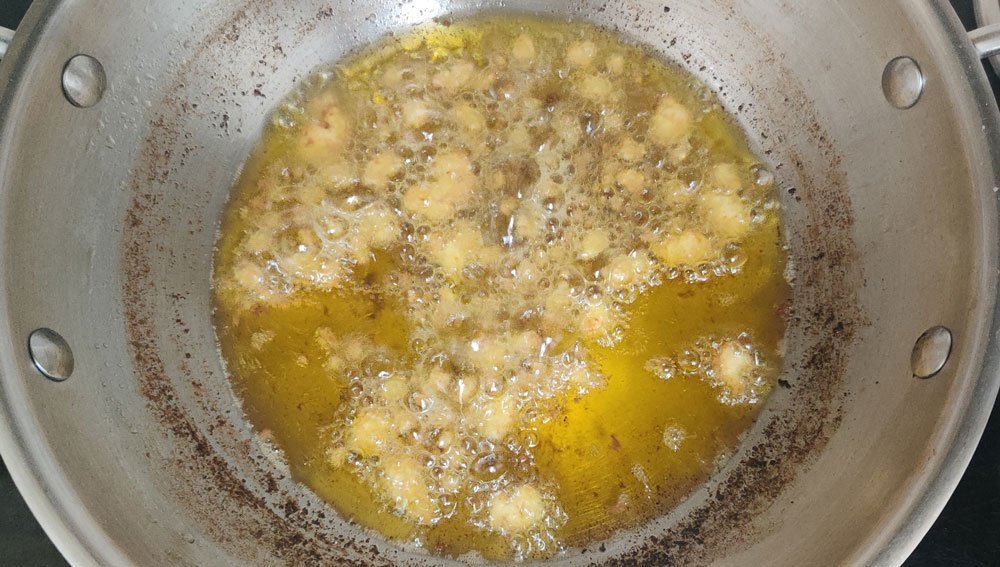
- Boil Till Milk Solids Starts Turning Golden Brown
The melted butter will change its appearance in various stages. First, it will foam, then the foam will evaporate and it will start sputtering. Then, you will notice white milk solids that look like soft cheese. Keep stirring and switch off the stove when the milk solids start turning slightly brownish in colour.

- Pass It Through Strainer
Leave it for a while and the burnt milk solids will sink to the bottom of the pan. Pour it through a strainer to separate it from the ghee.

- Allow It To Cool
The ghee will have a golden syrup-like colour now. But, in a day, once it cools down completely, the ghee will have a golden yellow colour. Store it in a dry, airtight container. It should last for several months provided you keep it away from moisture.


You may also like: Fastest and Easiest Way To Peel Garlic
Tips
- Always use a strainer to separate cream from milk. This reduces the milk content in the collected cream. So, in the final stage, when you boil the butter, there will be lesser milk solids in it.
- Keep the cream in the freezer and not the fridge. This way, the cream won’t get spoilt even if it takes a month or two to collect sufficient quantity.
- The melted butter will mostly turn into ghee in about 15 minutes when kept on a medium to high flame. Do not worry even if it takes a bit longer or if the milk solids get burnt. The ghee will still be suitable for use.
- Ensure that you boil the ghee till the milk solids turn brown. Else, the ghee may still have moisture and as a result, it will spoil quickly
- Store ghee in a dry airtight container. Ensure you use a dry spoon to take the ghee. You needn’t store it in the fridge. Just keep it in a dry spot inside the kitchen cabinet.
Related reading: How To Make Peanut Almond Butter In Mixer Grinder?